🏗️ Configuring an On-Premises RD Web Application in Entra ID
📍 Step 1: Create the Application in Entra ID
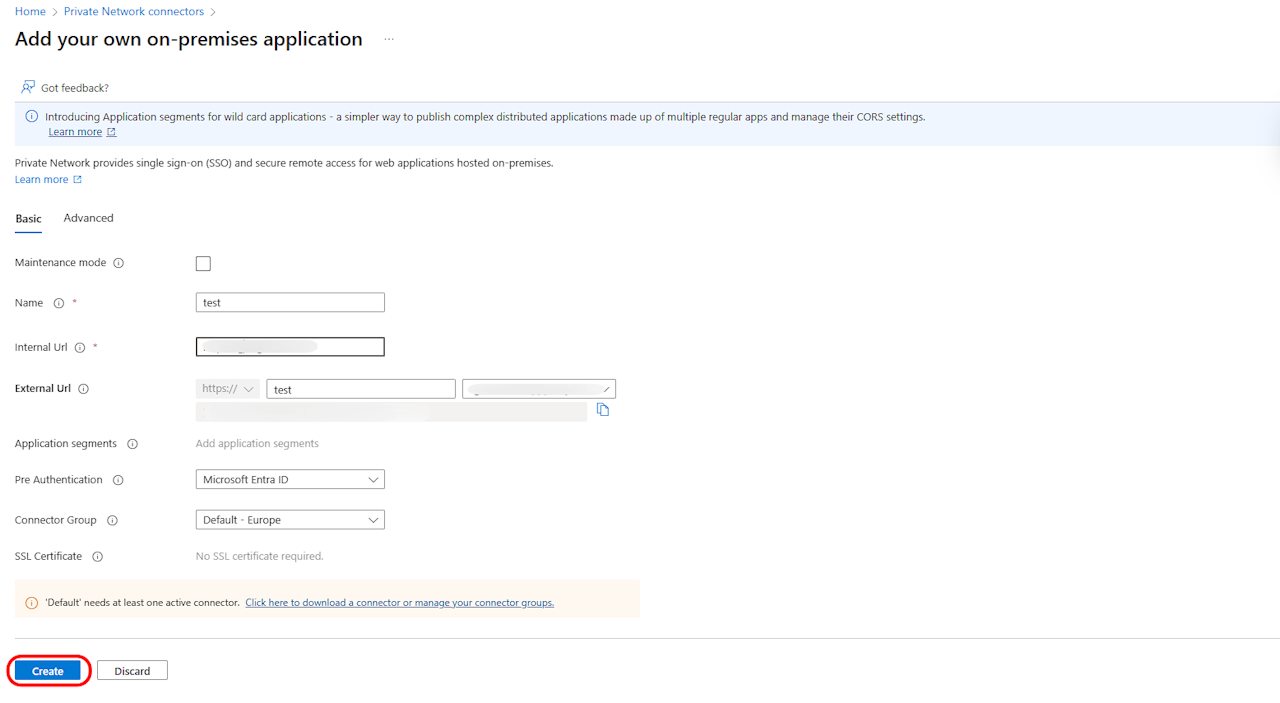
Add details:
Name: Enter a user-friendly name (e.g., Contoso Remote Desktop Web).
Internal URL: Enter the full URL your RD Web server uses on your internal network (e.g.,
https://rdweb-server.contoso.local/RDWeb/webclient).External URL: Choose a friendly external URL from your verified domains (e.g.,
https://remote.contoso.com).Pre Authentication: Ensure this is set to Microsoft Entra ID.
Click Create.
🎨 Step 2: Update the Home Page URL (Critical for RD Web)
Navigate to App Registrations.
Find the application you just created (you may need to change the filter to "All applications").
Select the app and go to its Branding section.
In the Home page URL field, you must append the specific path to the RD Web client:
Example: If the field is
https://remote.contoso.com/, change it to:https://remote.contoso.com/RDWeb/webclient/index.html
Click Save.
👥 Step 3: Assign Users & Groups
Go back to Enterprise Applications and find your new app.
Select Users and groups from the left menu.
Click + Add user/group.
Assign the specific users or security groups that should have access to this published application.
🔗 Step 4: Get Your External Link
In your application's overview within Enterprise Applications, navigate to the Application Proxy section on the left.
Copy the External URL provided. This is the link users will visit to access the application securely from outside your network.
Save this URL somewhere handy to share with your team.