💻 Installing & Using the Global Secure Access Client
📍 Step 1: Download the Client
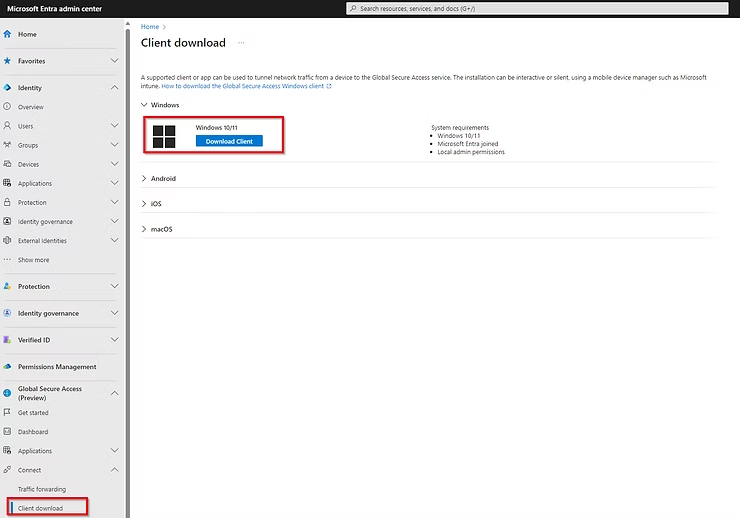
Users should navigate to the Microsoft Entra Admin Center.
They can find the client under:
Global Secure Access (Preview) → Connect → ClientClick Download client to get the installer.
Admins: You can also distribute this installer directly to users via your preferred software deployment method (e.g., Intune).
🖥️ Step 2: Install the Client
Run the downloaded installer (
GlobalSecureAccessClientSetup.exe).Follow the simple on-screen installation prompts.
Once installed, the client will place an icon in the Windows taskbar notification area (system tray). It looks like a small globe or building with a sparkle 🌐✨.
🔐 Step 3: Connect & Authenticate
Right-click the Global Secure Access taskbar icon.
From the context menu, select Sign in.
A sign-in window will appear. Users should enter their email address.
They will be prompted to complete authentication. If your domain is federated successfully, you will be taken to the AuthN login page:
Use Web-AuthN to log in (PIN, facial recognition, fingerprint)
This is the passwordless, secure login experience!
Upon successful authentication, the client will automatically connect.
✅ Step 4: Verify Connection & Use RDP
Once connected, the taskbar icon will change to show a "connected" status (often a checkmark or a filled-in globe).
Users can now open their Microsoft Remote Desktop client.
They can connect to internal servers by their hostname or FQDN (e.g.,
server01.contoso.local), just as if they were on the local network! 🎉